
This is the messiest thing, and it is ssoooo satisfying!!
This is the messiest thing, and it is ssoooo satisfying!!
Pattern repeat on Photoshop is my favourite thing!! I completely forgot how much i love it.
I wanted to put my hand drawn designs into Photoshop so i could play around with scale and how it affects the design.


I found that although i really like the small motif pattern repeats, i did not like that almost all of the detail was lost, where as the much larger designs were a lot clearer.
Despite this, i think i would rather have it somewhere in the middle so that it is unclear what they are so that it draws you in and then you realise that they are bums. This is why some of the shapes don’t actually have the bum crack (need to find a better word!) detail on them. I quite like the playful idea that you aren’t quite sure of what you are looking at, but it makes you chuckle when you realise.
One of the themes of my project is repetition, so obviously i have been drawn to repeat pattern.


For these drawings i have focused on a few key shapes of both male and female bums. I was thinking about the different ways i could make a repeat. I really like the idea of overlapping the shapes because it makes a more abstract image, however, the individual shape can be lost, which is not the case for the image on the left.
I used the ‘Grey’s Anatomy’ book as reference to draw these images (my ability to fill a page has struck again!). Although they took a while, i thoroughly enjoyed drawing them because i got to analyse the actual structure of a pelvis and understand it from the inside. For these particular images, i was able to see the key differences between the male and female pelvis’.


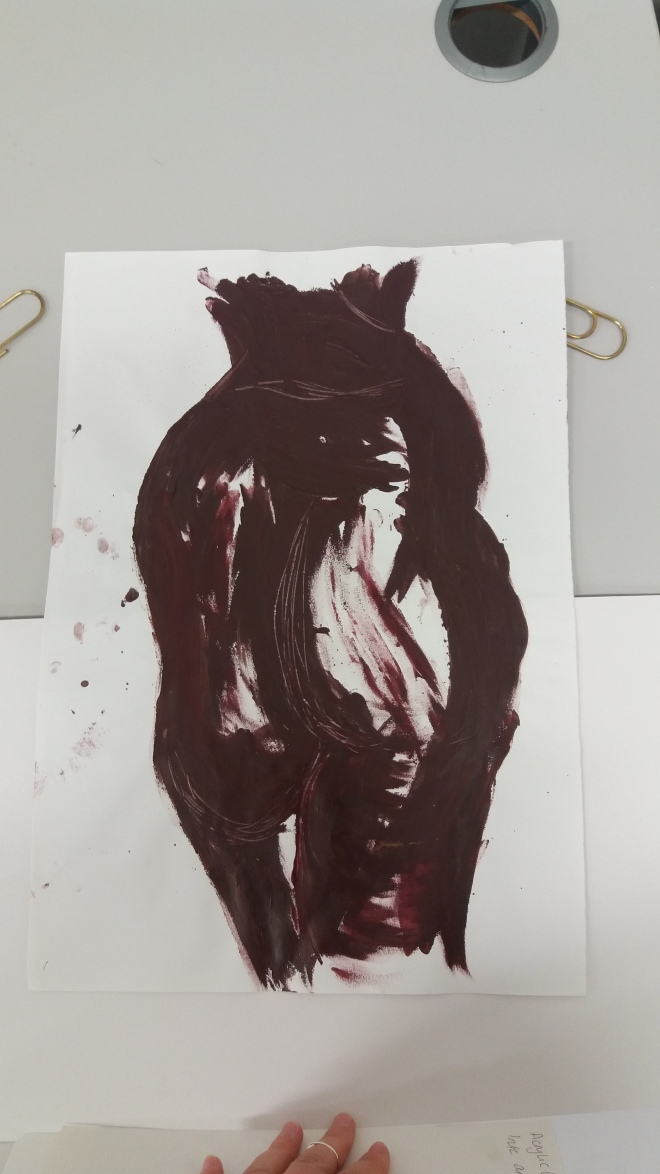
I used a gouache wash to cover the background and drew the image in Indian ink with an ink nib pen.
I wanted to draw large scale because i felt the need to make big marks instead of working in sketchbooks, so i used A2 paper or i stuck two together to make A1.


I either used previous drawings or photographs from books as a reference.
I found this process very freeing because i didn’t have to think too much about accuracy. I allowed myself to accentuate certain areas and features that i liked. I also liked how messy everything got as well!


I did like working in colour, but i think my favourites are the grey-scale pieces (which as a colour lover, i find very odd). I think it is because you can see the detail more, and the marks look a lot harsher than that which is done in greens. I particularly like the drawings where i have applied a watered down ink wash.
I want to record actual shapes of people, so i tried using myself. The drawing on the left; i drew around myself with my back to the wall (where the paper was taped), this gave me good waist definition, but did not replicate the view of a bum as the shape of the front of your pelvis is different to the back. So, the image on the right, i stood with my front facing the wall and drew around myself again. This one worked really well as it showed the more smoother out shaped that you get from the rear.


This will come in useful when recreating the shapes in my practice, it will also be a great way to collect some primary research.
I got this idea from ‘Look, Cover, Write, Check’ which is a way of learning spellings that i used to do at school. I wanted to apply the technique here by looking at an image and drawing from it. I would do this three times from each image with a timed gap between each one. The aim was to help me understand the construction of a bum and isolate what i wanted to focus on.


From the drawing process, i found that on the third drawing i was focusing mainly on the outer edge of the figure and less on the shadows and shading. I also became more confident with the lines i was making because the shapes became familiar to me.
Overall, i really like this method because it makes sure that i draw what i see confidently which i can then take into other areas of y practice. I can also recognise the varieties of shapes that are out there.
I was lucky enough to attend another life drawing class. This time i was focusing more on proportions and getting the whole figure to be on the page, as i seem to have a knack of zooming into one particular area.
There were several stages that we did, but this is the final drawing i did:
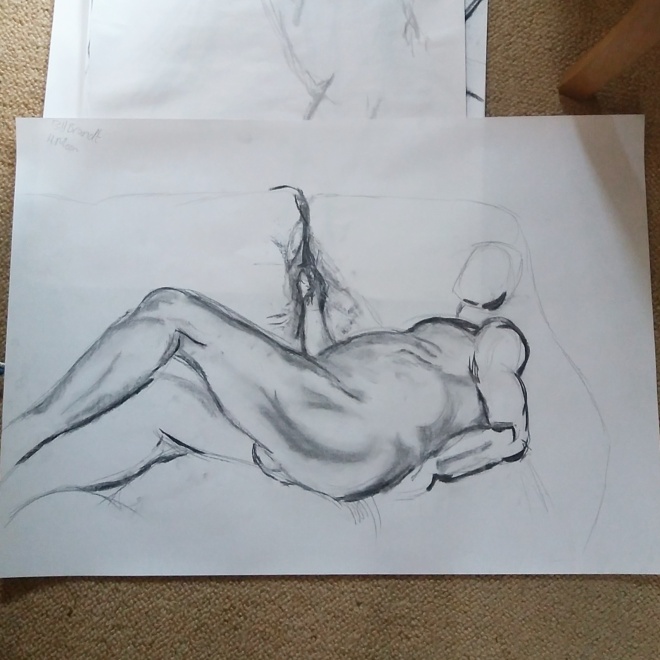
I was really pleased with the outcome because it showed what i had learnt. I managed to get the whole model on the page (barring his feet, but i am still counting it as the whole figure). I noticed from the other drawings that i did that i like to accentuate features by making them seem much larger than they are. I particularly like using a curved line which makes the figure look much more statuesque and as though they are a permanent feature on the background. Because of this, my tutor suggested that i look at the work of Henry Moore (who is already one of my favourites anyway) because he manages to create the same effect with his drawings and sculptures, by making them blend into the landscape. Another artist she suggested was Bill Brandt who is a photographer. He hightens the contrast in his work which is black and white anyway. This makes his work have more depth.
I look forward to taking part in more of the classes in the future.
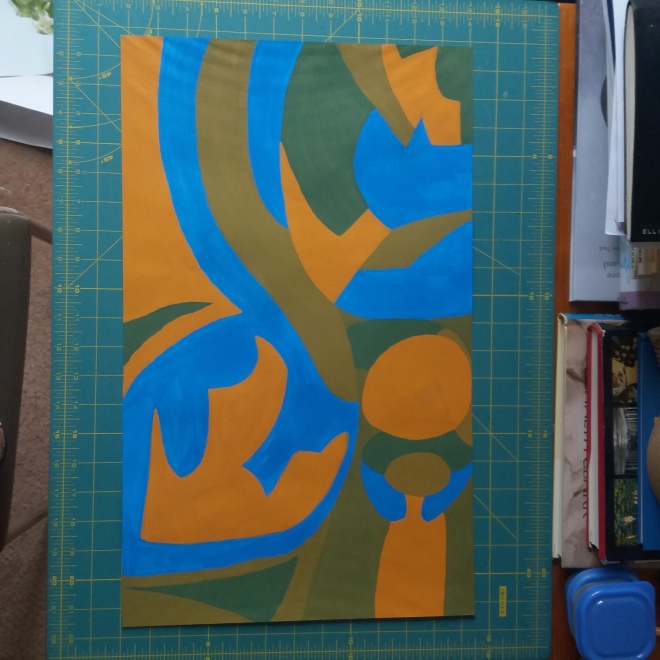
I have used gouache before and loved it!
For this drawing i merged 3 previous drawing together to create one large drawing. It was like painting with numbers because i divided each drawing into sections and then allotted a certain colour to those sections, making sure that sections of the same colour weren’t touching.
It took me a while to get used to mixing the paint again, getting it to the right consistency. I also really enjoyed working on a larger piece of paper and filling the space.
This was the first ever life drawing i have done, despite wanting to do it for years! The images below were actually drawn from the sketches i produced whilst drawing from a model, so they were completed after the model had gone.
It was a very interesting experience, as you have to work quite quickly in order to capture shadow, shape and proportion, for fear of the model beginning to freeze due to the temperature. By working back from these initial sketches (i did not take any photos of the model as a reference) i was able to blend each sketch together in the final image, and partially work from memory if there were any sections that were unclear. It is a process i am keen to repeat, as i thoroughly enjoyed it! (It also meant i could get a male’s bum, which is incredibly hard to find, as i have discovered from my research).


I worked in many stages to produce the final image. I began by drawing the shape (many times), and placing where the shadows went before working into the drawing with more detailed shading. Once all the marks were placed and worked into, i then spent time using a rubber to add highlights and remove any excess graphite and charcoal. It was a very lengthy process, however, i am really pleased with the outcome.
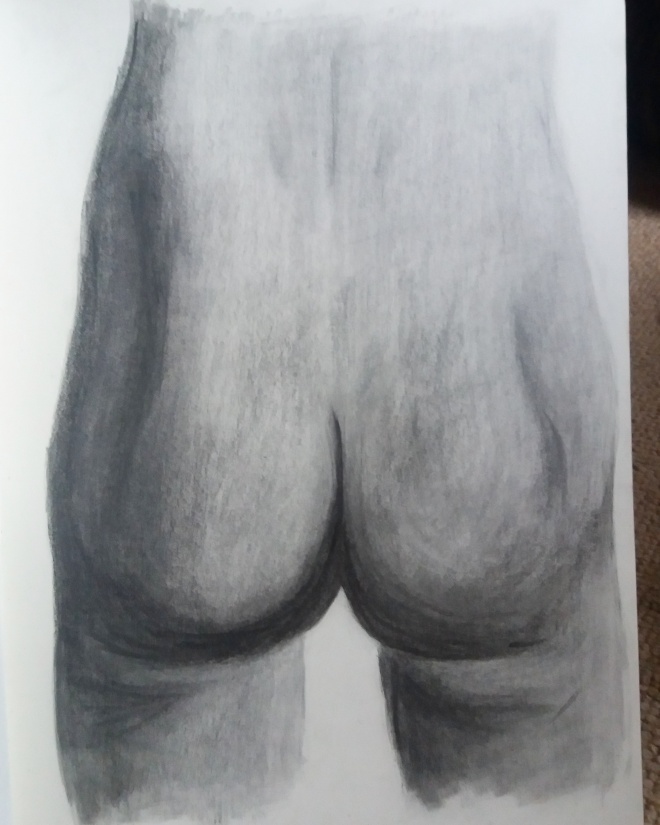
Before i finished the actual drawing, i worked into the image digitally to see how some areas needed to be blended and what needed to be removed. This part of the process was extremely helpful as it allowed me to see what i didn’t want to do on the final image, and areas that actually needed more work put into it. As a result of this, i would not consider the digital versions the ‘final’ piece of work, but they were part of a process that was invaluable!


